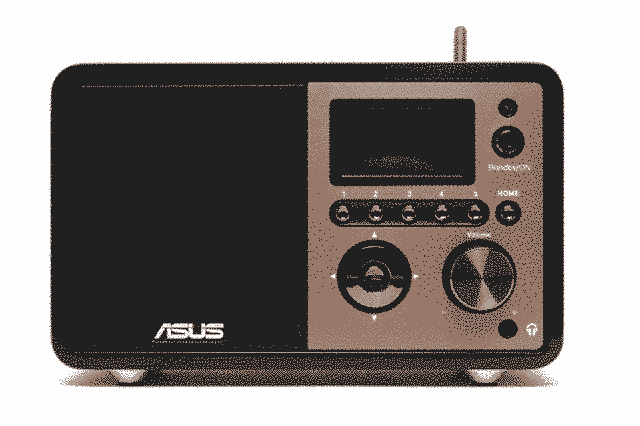
About a year ago, I came across an Asus Internet Radio (Air) at a local Goodwill and, despite knowing nothing about it, felt that I just had to have it. Well... it should come as no surprise to anyone that, out of the box, it didn't actually work. None of the thousands of configured radio stations are in service anymore, rendering this nice-looking appliance practically useless and ultimately prompting me to chuck it into a closet to die a slow, dust-ridden death.
That is, until I remembered about Icecast.
After digging my obsolete radio out of the closet, cleaning the dust off, and powering it back up, I discovered that it allowed me to configure custom stations, which I (correctly) assumed supported the Icecast protocol. This meant that, with a little configuration, I had an opportunity to create a novel radio station that I could tune into with a resurrected internet radio.
Anatomy of an Icecast Radio Station
For the uninitiated, Icecast is a streaming media protocol that is primarily used to power internet radio stations (and was particularly popular back when I was in high school). Created in 1998 by Jack Moffitt as an open source alternative for running an on-campus radio station, a typical Icecast station is comprised of two parts: a server and a source client.
The Server
Icecast is a server solution that is capable of streaming multiple audio formats over both HTTP and the SHOUTcast protocols. This is the meat of our service, which coordinates the streaming of multiple stations, manages quotas, and acts as an entrypoint for one-or-many streams (called mount points). What this means is that an Icecast server needs to have decent bandwidth, with the actual source clients only needing a decent connection to the Icecast server itself.
The Source Client
Rather than every virtual radio station requiring a robust server setup, and all the security and management that comes along with it, they instead only require a "source client." A source client is a piece of software that knows how to communicate with an Icecast server by creating a mount point to stream media from, which in turn allows external to connect and listen. While there are a number of source clients available, the one we will be using is called Ezstream.
Prerequisites
Before we can spin up our Docker-based internet radio station, there are a few things that we must set up first:
- A $5 DigitalOcean droplet running Ubuntu 18.04 with Docker and Docker Compose installed
- Alternatively (even preferably), you can use the DigitalOcean 1-Click Docker App
- A registered domain name (I'm a fan of name.com, having started my software development career there) with a single
Arecord (radio) pointing at the droplet IP- For the purposes of this tutorial, I'll be using
radio.example.com
- For the purposes of this tutorial, I'll be using
Getting Started
Once we've gotten the basics out of the way, we can now start putting our radio station together. Over the next few sections, I'll step through what needs to be done, and explain exactly why we need to do it.
The Directory Structure
The first thing we have to do is setup the proper directory structure. While there's no one way to structure a Docker Compose service, I'm a fan of putting each service within its own project directory in the /opt directory. For example, for this project we'll need to create a directory called /opt/radio, and then a few additional directories underneath it to store configuration and media files:
- Service Directory:
/opt/radio - Configuration Directory:
/opt/radio/config - Media Directory:
/opt/radio/media
The Docker Compose File (/opt/radio/docker-compose.yaml)
With our directory structure in place, we next need to create our Docker Compose file. This is a standard-looking YAML file that tells Docker Compose exactly how to set up our service, including what images to use, volumes to mount, and ports to open. We will be putting this file in /opt/radio/docker-compose.yaml:
version: '3'

services:

  ezstream:
    image: dashultz/ezstream:latest
    restart: always
    volumes:
      - '/opt/radio/config:/ezstream:ro'
      - '/opt/radio/media:/media:ro'
    networks:
      - radio

  icecast:
    image: infiniteproject/icecast:latest
    restart: always
    environment:
      - 'ICECAST_SOURCE_PASSWORD=SOURCE_PASSWORD'
      - 'ICECAST_ADMIN_PASSWORD=ADMIN_PASSWORD'
      - 'ICECAST_RELAY_PASSWORD=RELAY_PASSWORD'
      - 'ICECAST_HOSTNAME=radio.example.com'
    volumes:
      - '/etc/localtime:/etc/localtime:ro'
    ports:
      - '8000:8000'
    networks:
      - radio

networks:
  radio:
    driver: bridge
At first glance, the above file may be a bit confusing, so let's break it down a bit:
version: '3'
This directive indicates which version our Docker Compose file is based off of. The current major version at the time of writing is Version 3, however for more information you can read the Docker Compose file version reference.
networks:
  radio:
    driver: bridge
The networks directive defines Docker networks that must be created to support this service. While more than one network can be defined (or used, if referencing external network configurations), we will only need a single bridge network for our radio to properly operate.
services:
  ezstream:
    # ...
  icecast:
    # ...
The services directive allows us to define one or more Docker containers that our service will be spinning up. In this case, we are launching two services: icecast and ezstream, our radio server and source client, respectively. From here on, I'll explain the various components that can be found in either the ezstream service, or the icecast service (or both).
image: infiniteproject/icecast:latest
The image directive indicates which Docker image we intend to use for our service. With this, Docker Compose will download the image from Docker Hub (for example, inifiniteproject/icecast) and start it using the parameters defined within the image's Dockerfile, as well as any additional information contained within our own docker-compose.yaml file.
In this tutorial, we will be downloading only the most recent image for each service, however if you would like to use a specific image, replace the :latest tag with one listed in the Tags tab of the given project's Docker Hub page (such as :v1 or :beta).
restart: always
The restart directive tells Docker exactly what to do with the provided service when it exits. For example, always indicates that we always want this image to run, which will ensure that our radio station always starts back up if it ever crashes.
volumes:
  - '/opt/radio/config:/ezstream:ro'
  - '/opt/radio/media:/media:ro'
The volumes directive defines folders that we intend to "mount" into the given Docker container. These are always defined in the host_path:client_path format, with an optional :ro flag allowing for read-only access to the mounted volume. While more advanced users may choose to use Docker Volumes, I'm partial to mounting local directories because it makes backups a bit easier to handle.
networks:
  - radio
The networks directive allows you to define which networks the service is apart of. In this example, this is only the radio network, however for more advanced configurations it isn't unheard of for different services to be apart of different networks for the sake of things like isolation.
ports:
  - '8000:8000'
While it is possible to define which ports a Docker container needs exposed within a Dockerfile, if you want to reserve a specific port, this is where the ports directive comes into play. Similarly to the volumes directive, ports are always defined in the host_port:client_port format.
environment:
  - 'ICECAST_SOURCE_PASSWORD=SOURCE_PASSWORD'
  - 'ICECAST_ADMIN_PASSWORD=ADMIN_PASSWORD'
  - 'ICECAST_RELAY_PASSWORD=RELAY_PASSWORD'
  - 'ICECAST_HOSTNAME=radio.example.com'
Finally, many Docker images allow for environment-variable based configurations (such as the icecast image used in this tutorial). The environment directive allows us to define the environment variables that are to be passed to the Docker image, which in-turn gives us the ability to configure some images without having to mount any external volumes.
The Ezstream Playlist Program (/opt/radio/config/ezstream.sh)
Once we've setup our Docker Compose file, we next need to make sure to create the necessary configuration files that will be included in the volume mounts.
The first of these files that we need to create is our Ezstream playlist program, which must be stored at /opt/radio/config/ezstream.sh. This program will be used by Ezstream to retrieve the next audio file (in MP3 format) for streaming. While this example is fairly simplistic in nature, you can see how some clever coding would allow us to retrieve specific files based on the time of day (or time of year) for more advanced programming purposes:
#!/bin/bash

find /media -name \*\.mp3 | sort -R | tail --lines 1
The Ezstream Config File (/opt/radio/config/ezstream.xml)
Next, we need to create our Ezstream configuration file (stored at /opt/radio/config/ezstream.xml), which tells Ezstream exactly how to communicate with our Icecast service and what to play through it:
<!--
   EXAMPLE: MP3 playlist stream WITHOUT reencoding

   This example streams a playlist that contains only MP3 files. No other file
   formats may be listed. Since ezstream will not be doing any reencoding, the
   resulting stream format (bitrate, samplerate, channels) will be of the
   respective input files.
 -->
<ezstream>
  <url>http://icecast:8000/stream</url>

  <sourcepassword>SOURCE_PASSWORD</sourcepassword>
  <format>MP3</format>
  <filename>/ezstream/ezstream.sh</filename>
  <playlist_program>1</playlist_program>
  <stream_once>0</stream_once>

  <!--
    The following settings are used to describe your stream to the server.
    It's up to you to make sure that the bitrate/samplerate/channels
    information matches up with your input stream files.
    -->
  <svrinfoname>Example Radio</svrinfoname>
  <svrinfogenre>Radio</svrinfogenre>
  <svrinfodescription>This is a radio description.</svrinfodescription>

  <!--
    Prohibit the server to advertise the stream on a public YP directory:
    -->
  <svrinfopublic>0</svrinfopublic>
</ezstream>
While the above file should be relatively self-explanatory, the most important things to pay attention to are:
- The
<url>value is the Icecast server and mount point we want to connect to. The server must behttp://icecast:8000, however the mount point can be anything we want (in this case/stream) - The
<sourcepassword>value, which must match theicecastservice'sICECAST_SOURCE_PASSWORDenvironment variable exactly - The
<svrinfoname>value, which sets the name of our radio station - And the
<svrinfodescription>value, which sets the description of our radio station
All of the other values should remain unchanged, however if you want more robust examples the examples directory of the Ezstream project repository is an excellent place to start.
The Media
With everything finally configured, the last thing we need to do is get some media. To do this, all you need to do is add MP3 files (in any directory structure you choose) into the /opt/radio/media directory and our Ezstream playlist program will select one at random whenever it needs something new to play. Take note that, while you can use any MP3 file you can get your hands on, if you intend to expose your station to the wider internet I suggest either avoiding copyrighted material, or reading up on internet streaming licensing.
Running Your Radio Station
With all of the pieces in place, starting up our radio station is just a single command away (executed from within our project directory at /opt/radio of course):
sudo docker-compose up -d
In a nutshell, what this command does is reads the docker-compose.yaml file and, based on its contents, starts our two defined services in the background (which is what the -d option does). If you'd like to see what Docker containers are currently running, you can always execute the sudo docker ps command, which will return something like this:
CONTAINER ID  IMAGE                    CREATED      STATUS     NAMES
a5b594cc63bb  dashultz/ezstream        3 days ago   Up 3 days  radio_ezstream_1
45ccfa0f31ba  infiniteproject/icecast  2 weeks ago  Up 3 days  radio_icecast_1
Once our radio station is up, connecting to it is as straightforward as loading your ICECAST_HOSTNAME with the appropriate mount point (such as http://radio.example.com:8000/stream) in your favorite browser (which, coincidentally, knows how to speak Icecast too).
--
If you like this post or one of my projects, you can buy me a coffee, or send me a note. I'd love to hear from you!